a. Click the icon on the left for the Full menu.
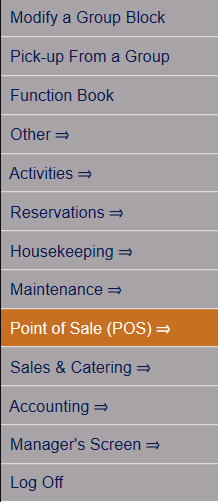
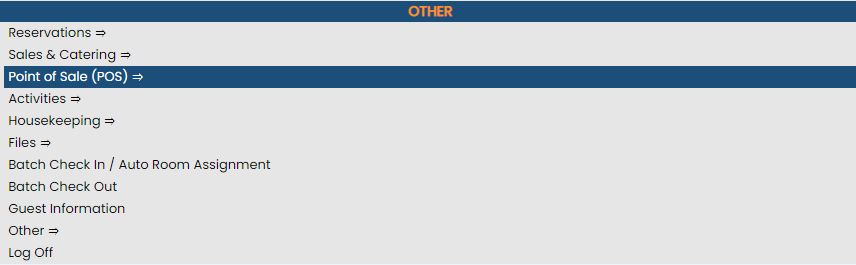
Select Point of Sale (POS) => from the Quick Menu to open the POS Main Menu Screen.
 OR
OR 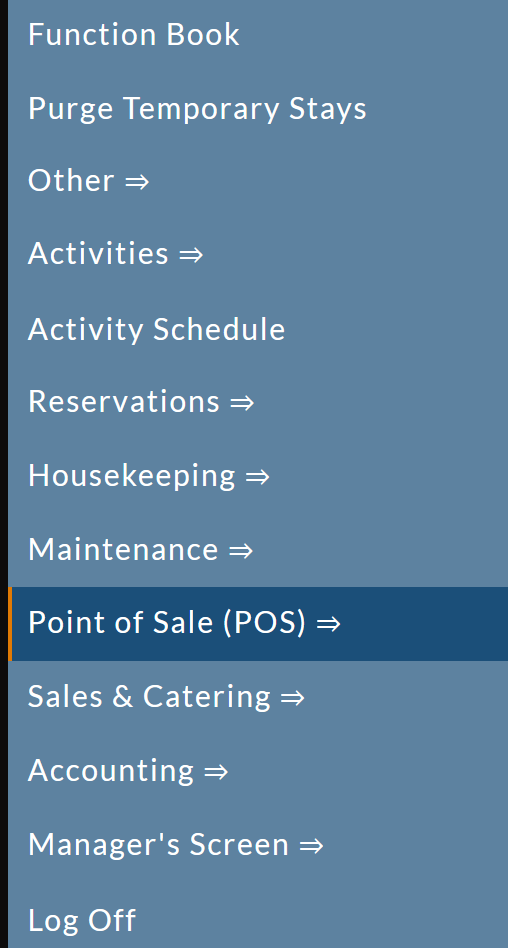
Note: The exact arrangement of the options in your quick menu may differ from this example.
OR
 OR
OR 
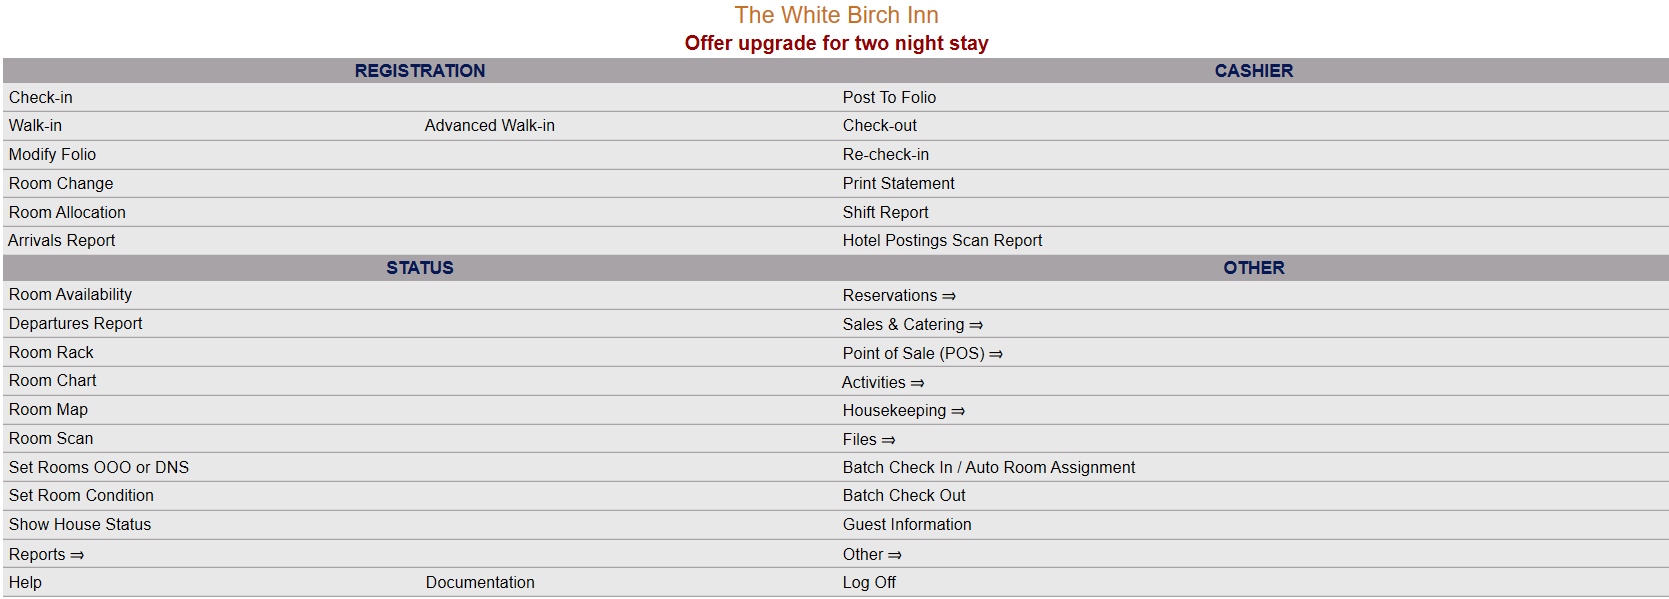
This will display the Full menu in a tabular form, with four sections, Registration, Status, Cashier and Other.
 OR
OR 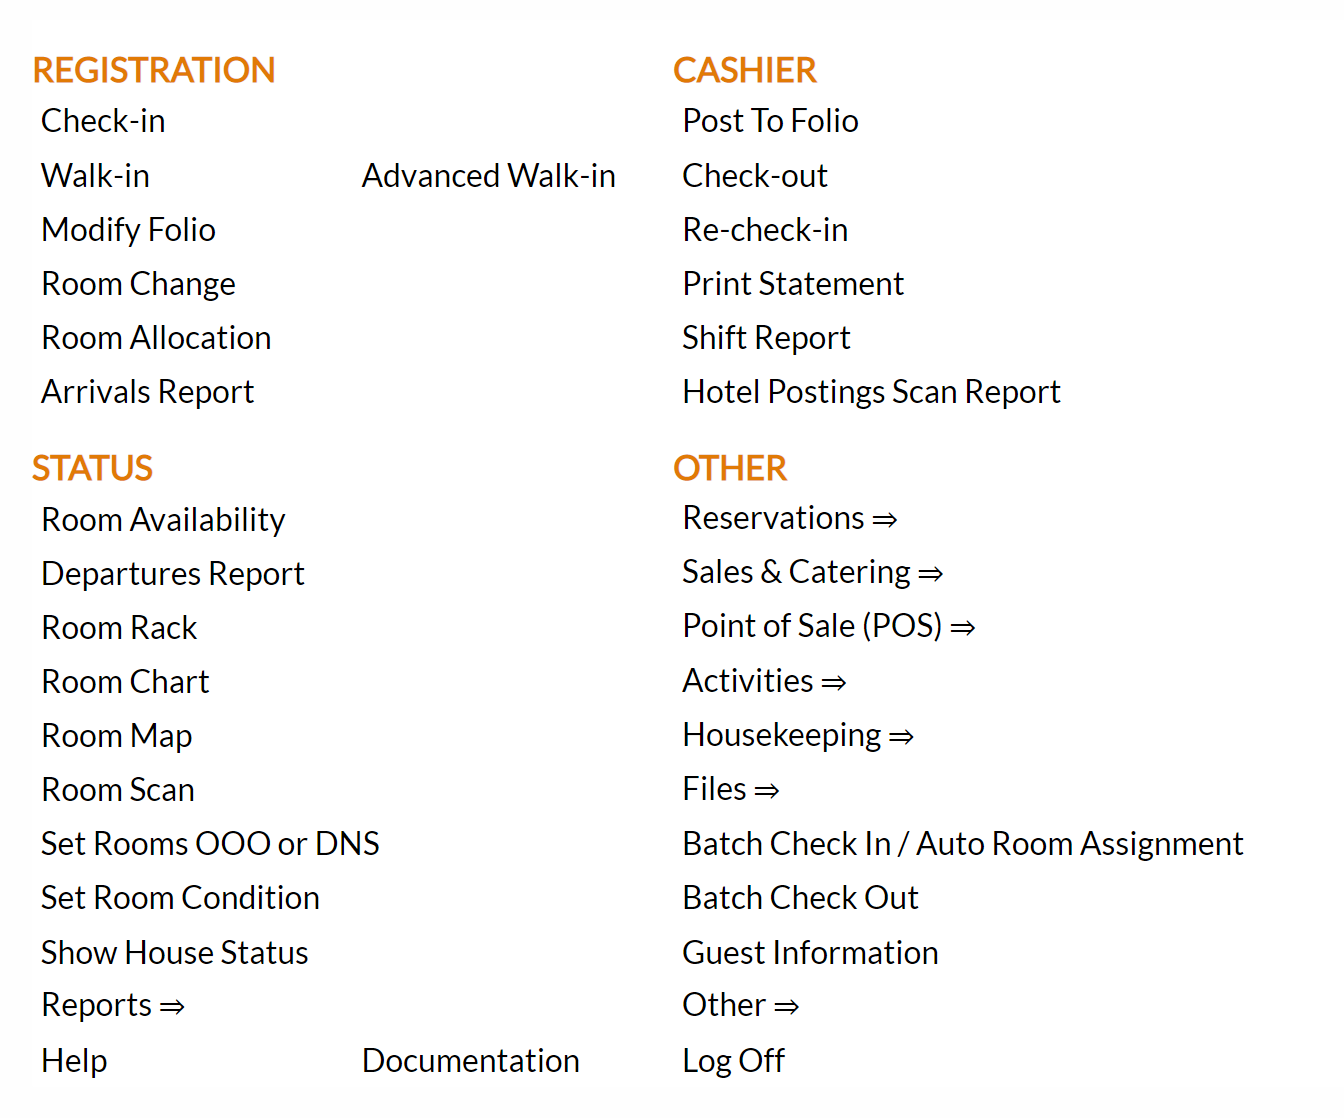
From the Other section, select Point of Sale (POS) =>.
 or
or 
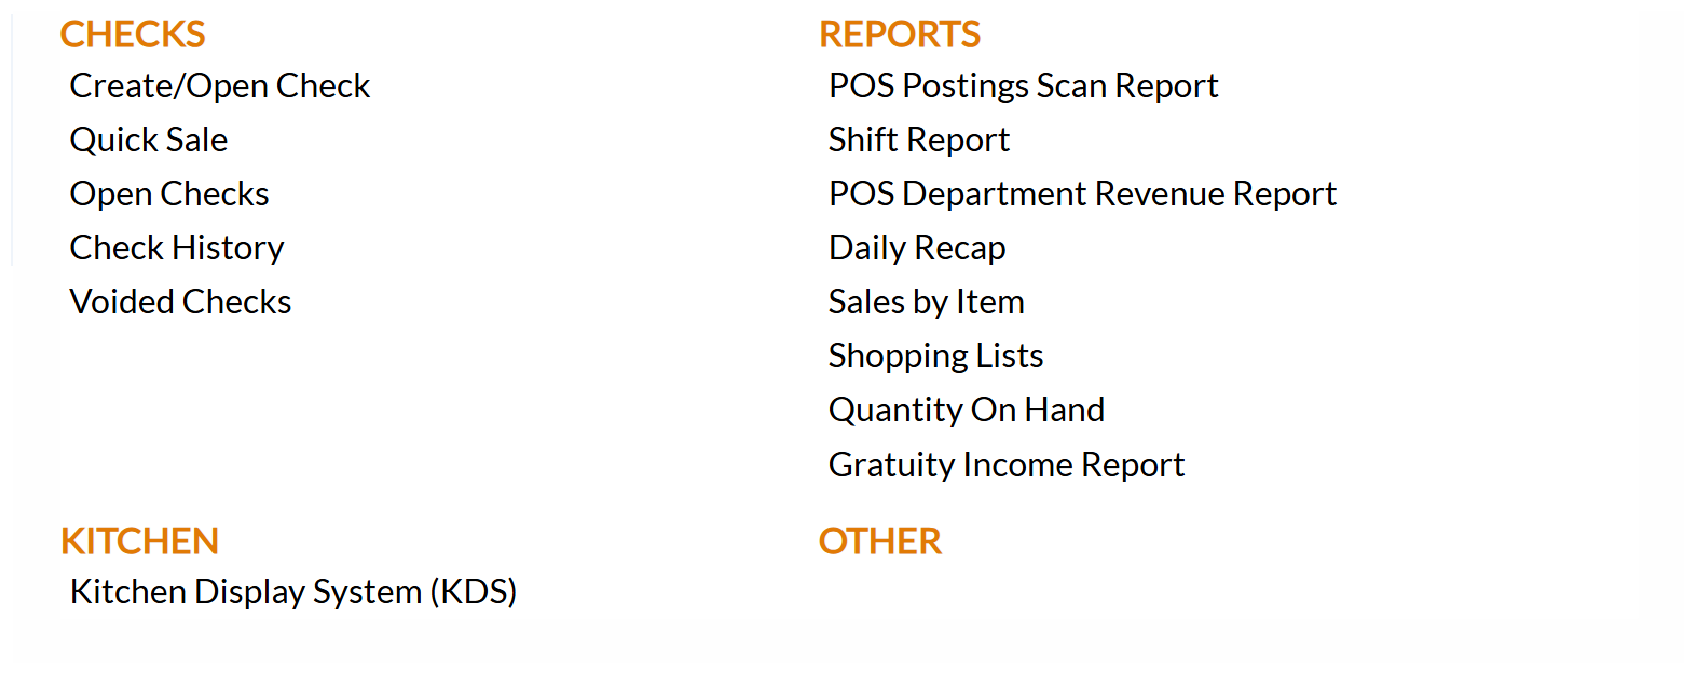
This will display the POS Main Menu Screen, which has four categories: Checks, Reports, Kitchen and Other; however the Other Category does not currently contain any commands.
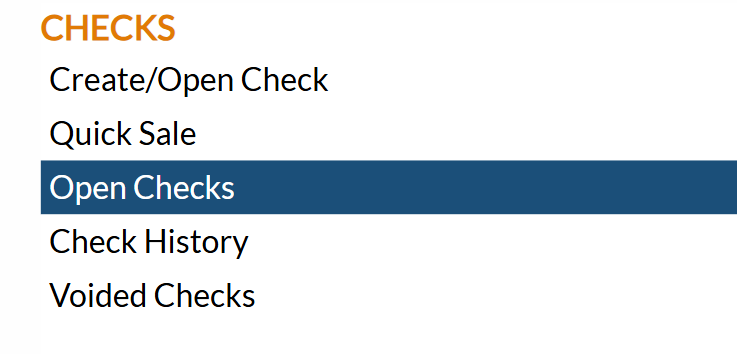
Select Open Checks from the Checks section:
When selected, the Open Checks screen will open.
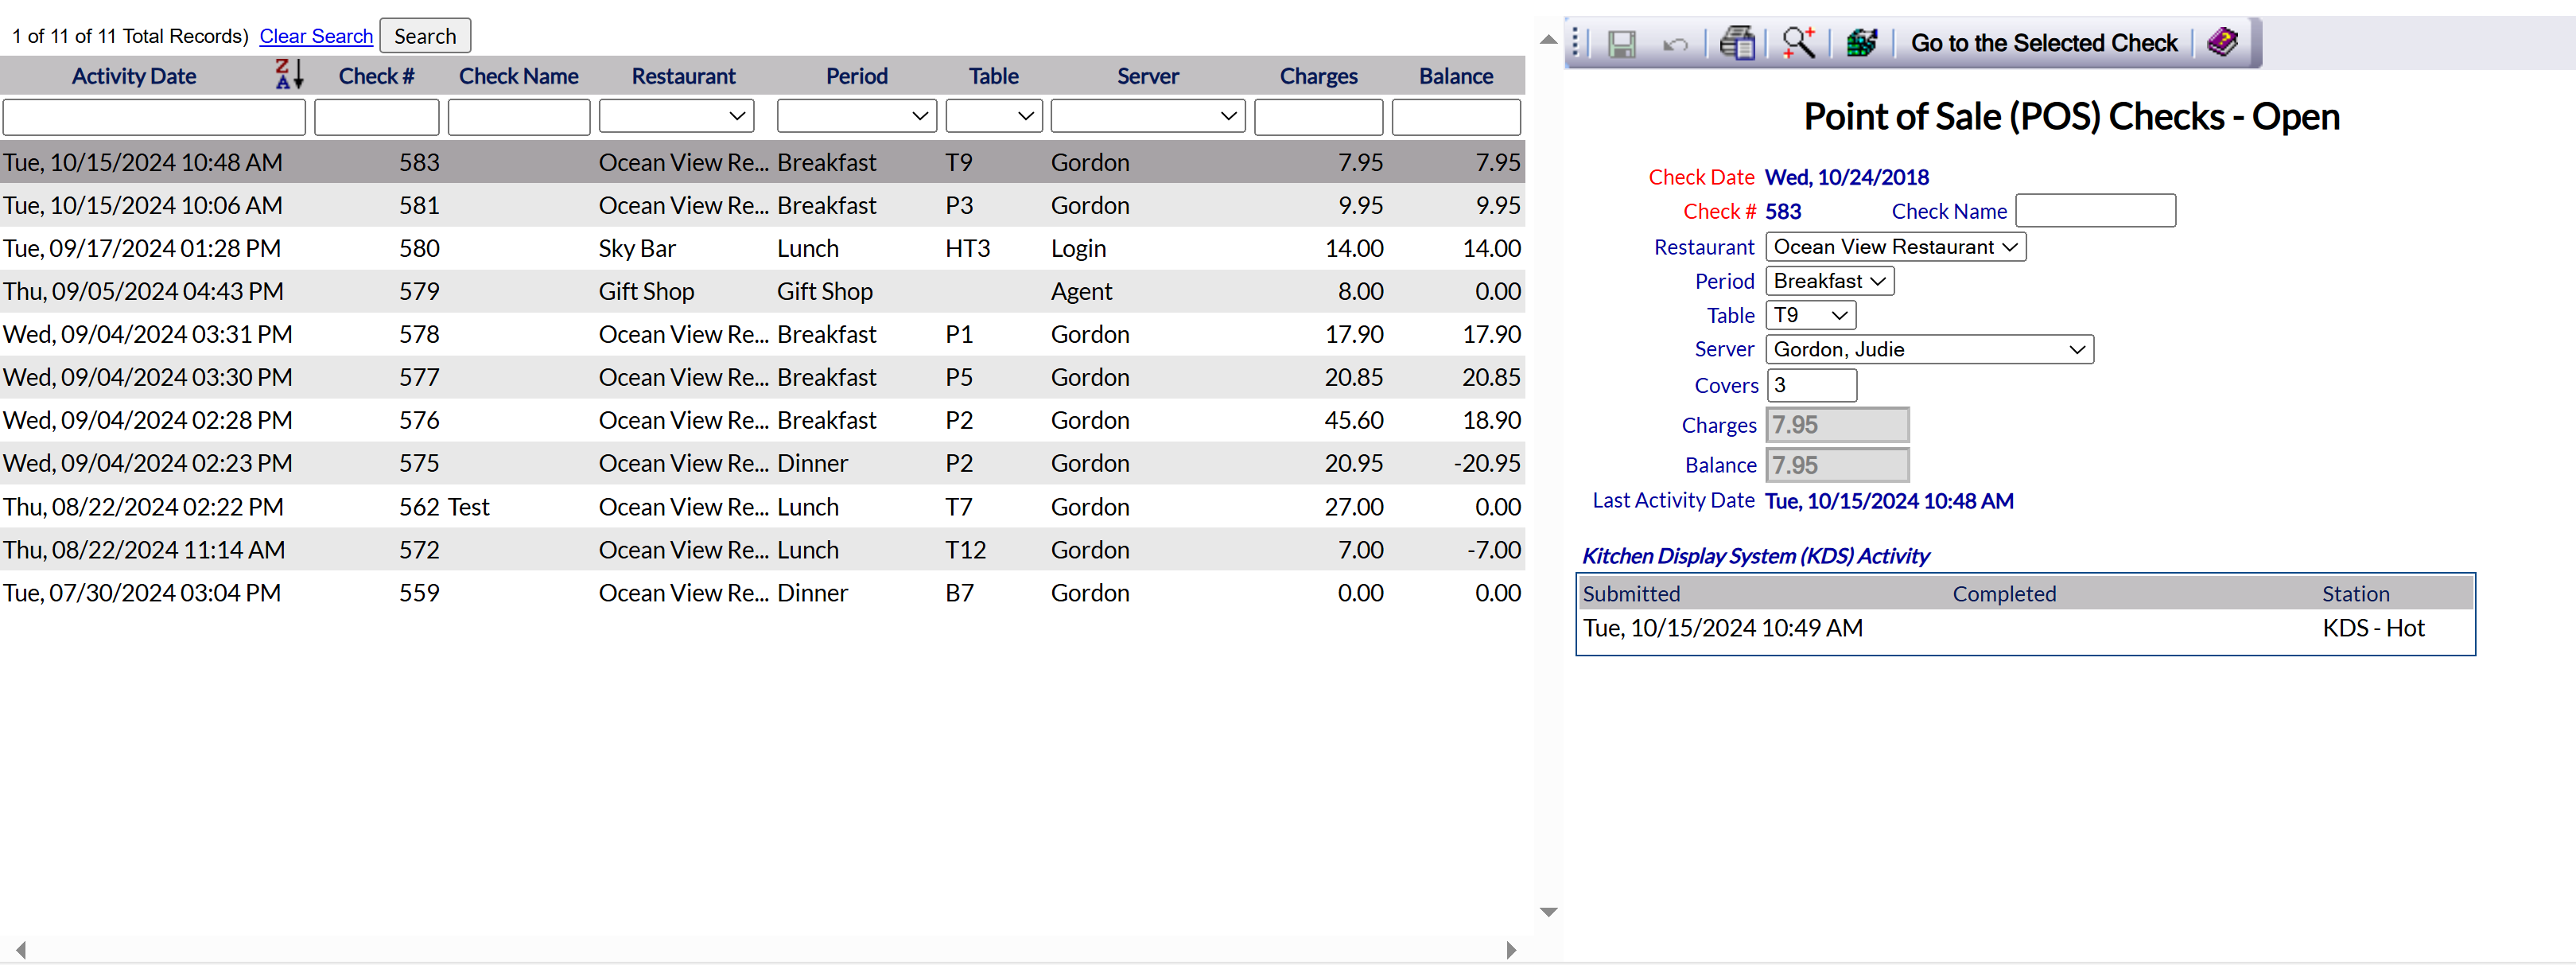
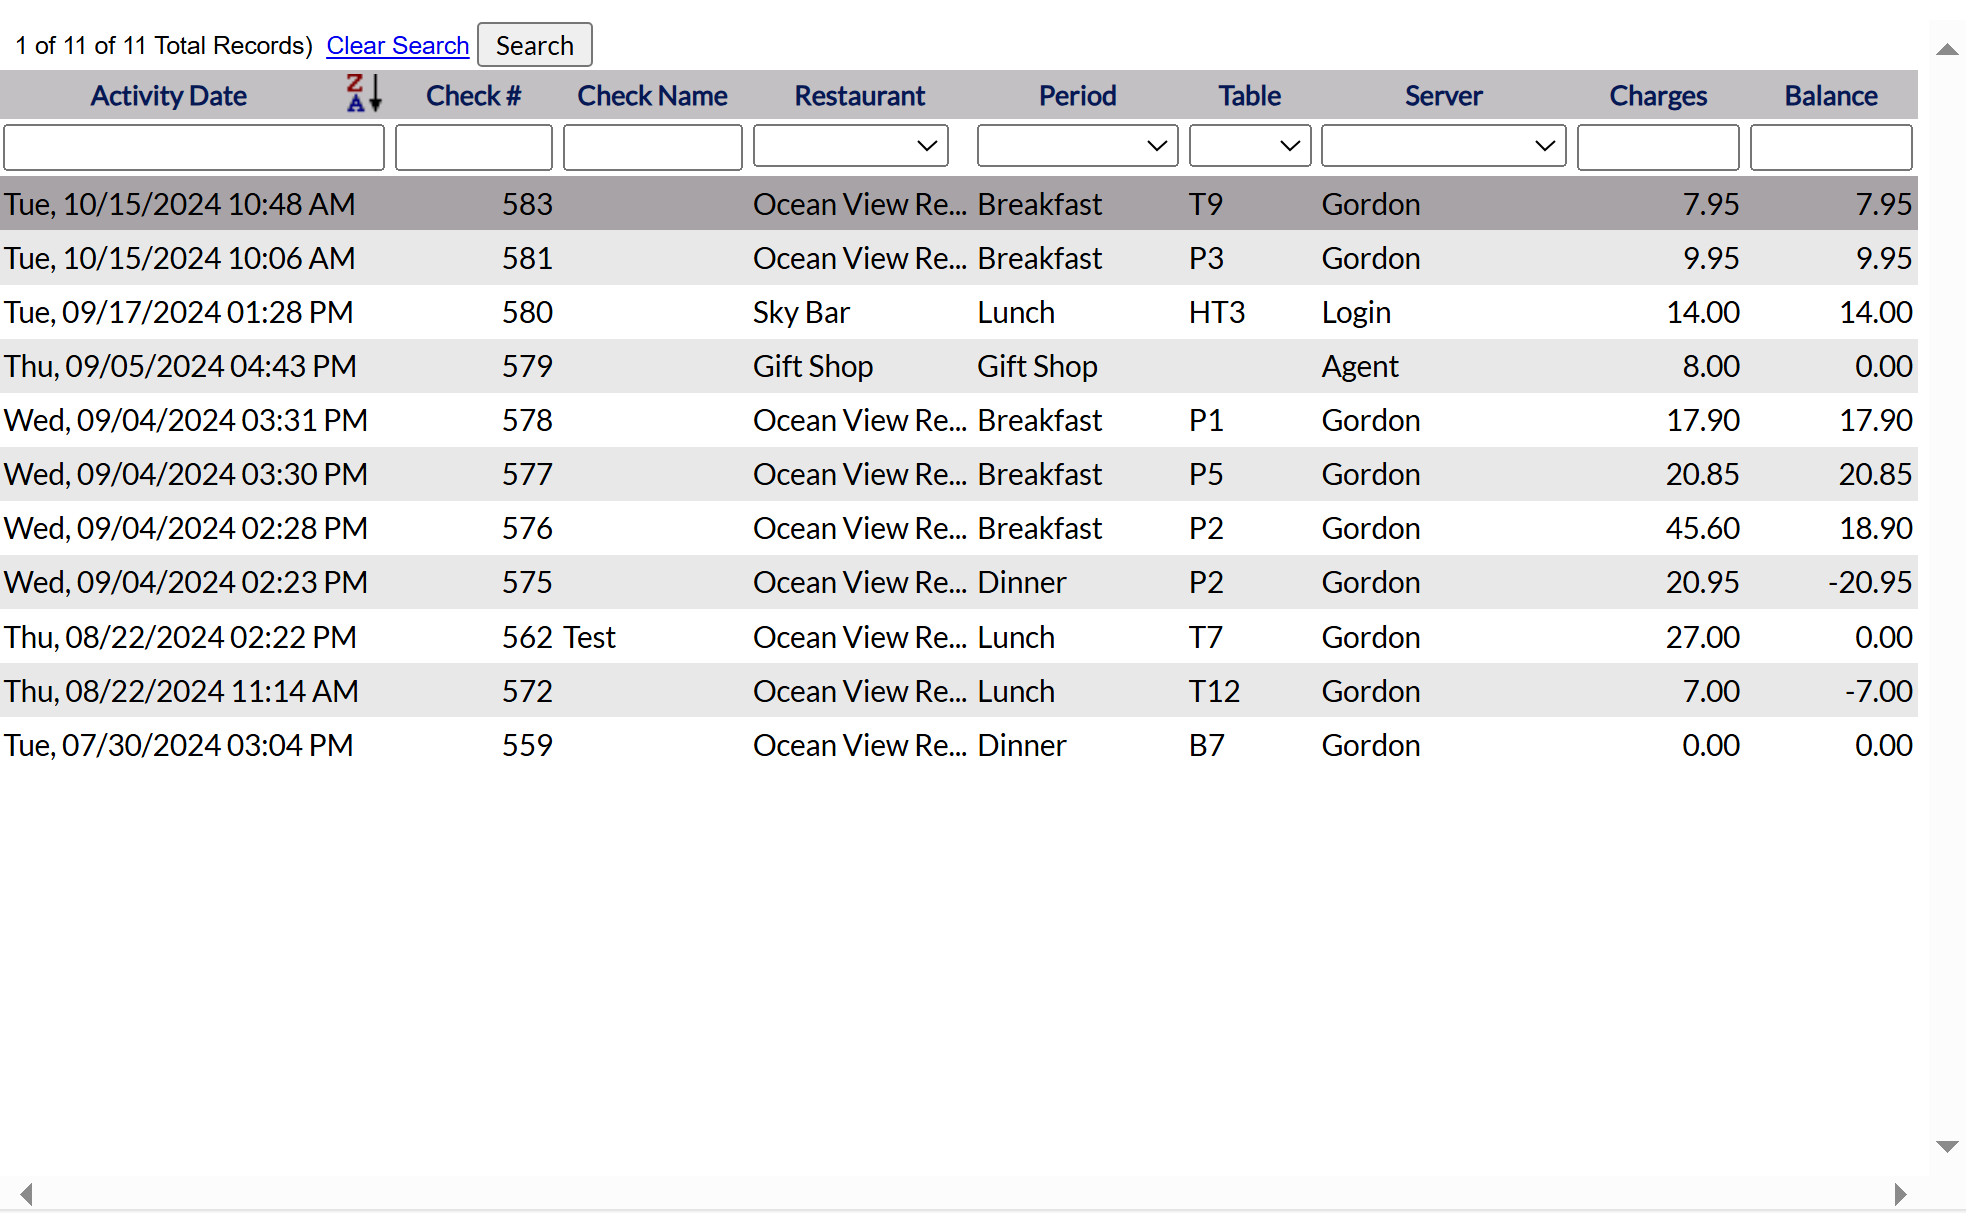
The screen display is split into two frames, with listings of all open checks on the left-hand side and details of any selected open check on the right-hand side. Any changes made to a listing detail on the right, once saved, will be updated in the listings to the left.
The screen changes to show on the left-hand side a list of currently open checks, sorted by Activity Date, and on the right-hand side the detailed view of a selected check; selecting a check from the list on the left changes the right side of the screen to that particular check.
Note: if there are no currently open checks the screen will say No Records To Retrieve!
Clicking on any of the column headers sorts the list, in ascending order, by that column. These include:
Activity Date
Check Number
Check name if used by the property,
Restaurant: A drop-down menu of the available Meal locations,
Period: A drop-down menu of the available Meal Period options,
the specific Table checks were issued to,
the Server,
the Charges and
the Balance still due.
Use the text boxes and drop-down lists located at the top of the list to search or filter the list by the information entered. If using a text box to search the list, click the Search button above the criteria boxes to apply the search.
Click Clear Search to remove any search filters applied to the list.
Once the desired check has been located in the list, click to highlight it in the detailed view area on the right-hand side of the screen.
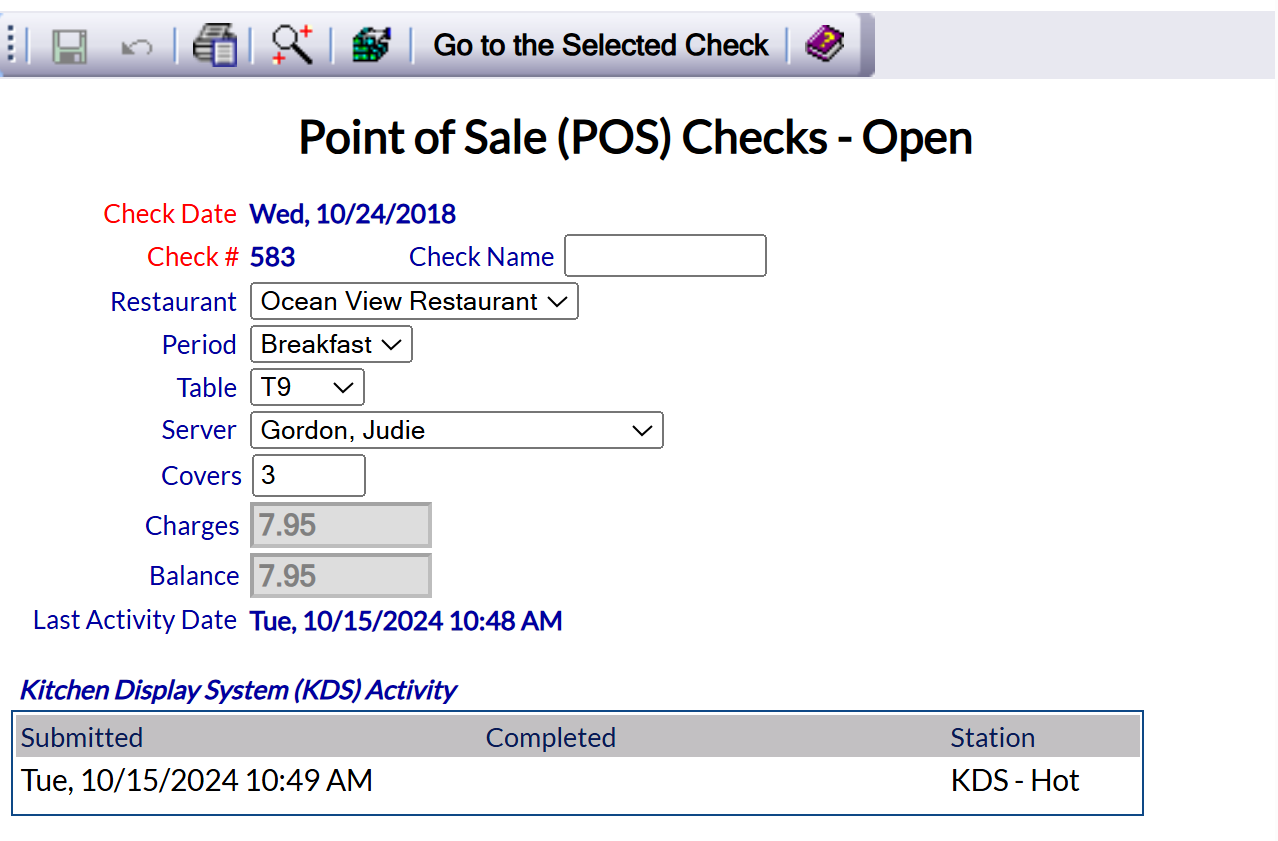
Note: The information displayed is the information automatically generated from the Restaurant Check screen.
Check Date: This is the system date that the check was generated. Whilst it is a required field for a check, it cannot be edited here.
Check #: The check number assigned to this check. Again, it is a required field but cannot be edited here.
Fields in the Detail View which can be edited to ALTER the information already entered for the check include:
Check Name: You may enter a check name here if desired.
Restaurant: The restaurant at which the check was generated. A different one can be selected from the drop-down menu if wished.
Meal PeriodThe meal period at which the check was generated. A different one can be selected from the drop-down menu if wished.
Table: The table for which the check was generated. A different one can be selected from the drop-down menu if wished.
Server: The server whom generated the check. A different one can be selected from the drop-down menu if wished.
Number of Covers: The number of covers for which the check was generated. If wished, this can be altered to any number desired by typing the number into the field directly.
Fields for the he Charges and the Balance still due are shown but are grayed out and not possible to alter in this screen.
Last Activity Date: The last time a check saw any activity is displayed below the Detailed View.

This table shows any activity (tickets fired to) on a Kitchen Display System (KDS) associated with this check.
Submitted: When the ticket was submitted to the KDS
Completed: When the ticket was completed.
Station: The KDS station the ticket was sent to.
Any entries in this table may be clicked on for more detail. Clicking will open the Kitchen Display System Activity screen where the details of the ticket(s) associated with this check sent to the KDS will be available to view.
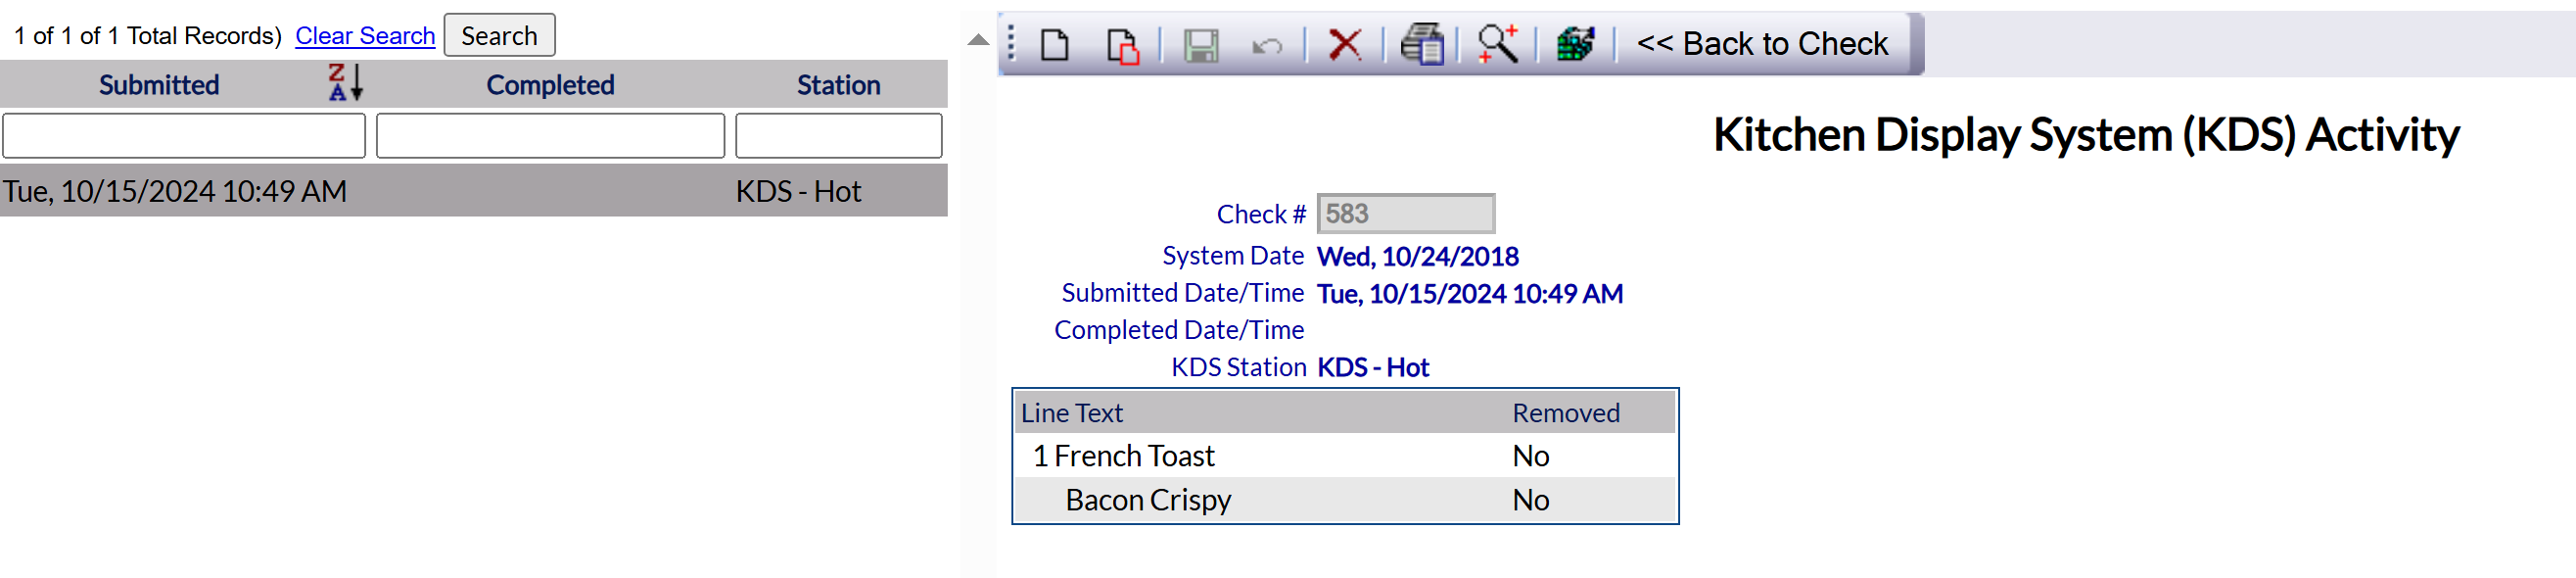
Use the << Back to Check button in the local toolbar to return to the Open Checks screen.
From the Detail View screen, you can also click the Go to the Selected Check button in the local toolbar to open the Restaurant Check screen with the relevant check displayed, where you may modify the check as wished. Again, it is RECOMMENDED that to make changes to an open check that you use this button and open the Restaurant Check screen, where you may modify the check as wished. However for instances such as the wrong server being logged in to the system when generating checks, it can be simpler to make the change to the correct server here for all affected checks rather than open each check individually on the Restaurant Check screen.
If you make changes in the Detail View, you must click the Save button ( ) in the local toolbar to apply your changes to the check. Once saved the altered information will also display on the left-hand side in the list.